Guides › Photos
How to batch resize images on Mac
Updated 10 October 2026 · by Vistaar Studio
Short answer: open all the photos in Preview, click a thumbnail in the sidebar, press ⌘ A to select them all, then choose Tools › Adjust Size and enter a width. Every selected photo is resized at once. Preview changes the files themselves, so duplicate them first if you want to keep the originals.
Your Mac has four free ways to resize a pile of photos, and each is better at a different job. Preview gives you exact pixel sizes. The Finder's Convert Image action is the quickest and leaves your originals alone. Shortcuts turns a resize you do every week into one click. Terminal handles a folder of hundreds of photos without blinking. Here's how to use each one, and how to choose.
Before you start: protect your originals
Shrinking a photo throws away pixels for good. If you resize the only copy of a holiday photo to 800 pixels wide, you can't get the full-size version back later. So:
- Select the photos in the Finder and press ⌘ D to duplicate them, or copy them into a new folder, before using Preview.
- Photos in the Photos app aren't files in a folder. Select them, choose File › Export › Export [number] Photos, and save them to a folder first. (The Export window can resize too: choose Size › Custom.)
Method 1: Preview (exact sizes, built in)
- Select all the photos in the Finder, then Control-click and choose Open With › Preview. They open in one window.
- If you can't see thumbnails down the left side, choose View › Thumbnails.
- Click any thumbnail, then press ⌘ A to select all of them.
- Choose Tools › Adjust Size.
- Make sure Scale proportionally is ticked, so photos don't get squashed. Pick pixels and type a Width (for example 1600), or use the Fit into menu for a ready-made size.
- Click OK, then choose File › Save (or close the window and confirm).
Mixed portrait and landscape photos? A width of 1600 makes landscape photos 1600 px wide but tall portrait photos much bigger overall. Use Fit into with a custom box such as 1600 × 1600 instead: each photo's longest side becomes 1600, whichever way round it is.
Made a mistake on a photo that's still open? File › Revert To › Last Opened takes it back.
Method 2: Finder's Convert Image (fastest, keeps originals)
Since macOS Monterey, the Finder has a Quick Action that resizes and converts in one go, and saves new copies next to the originals.
- Select the photos in the Finder.
- Control-click one of them and choose Quick Actions › Convert Image.
- Choose a Format (JPEG, PNG or HEIF) and an Image Size: Small, Medium, Large or Actual Size. The window shows roughly what file size you'll get.
- Untick Preserve Metadata if you'd rather strip details such as location before sharing.
- Click Convert to [format]. The new copies appear in the same folder.
The catch: you can't type an exact pixel size, only Small, Medium or Large. It's perfect for "make these small enough to email", not for "this form needs 600 × 600".
Method 3: a Shortcut you can reuse
If you resize photos to the same size every week (for a blog, a shop, a client), make it a right-click option once:
- Open the Shortcuts app and click + to make a new shortcut. Name it, for example, "Resize to 1600".
- In the details panel (the i button), turn on Use as Quick Action and Finder, and set it to receive Images.
- Add the Resize Image action and set the width to 1600 (leave height on Auto).
- Add Save File and choose a folder, or turn off "Ask Where to Save" to always use the same one.
Now select photos in the Finder, Control-click, and choose Quick Actions › Resize to 1600. Saving to a separate folder keeps the originals as they are.
Method 4: Terminal with sips (hundreds of photos)
Every Mac includes a command-line image tool called sips. It's very fast and never touches your originals if you send the output to another folder. Open Terminal and type cd (with a space), drag the photo folder into the window, and press Return. Then:
mkdir resized
sips -Z 1600 *.jpg --out resized/
-Z 1600 makes the longest side of every JPEG 1600 pixels and keeps the proportions, so it's the same as Preview's "Fit into 1600 × 1600". A few useful variations:
- Exact width:
sips --resampleWidth 1200 *.jpg --out resized/ - iPhone HEIC to JPEG at the same time:
sips -Z 1600 -s format jpeg *.heic --out resized/ - Smaller files: add
-s formatOptions 70to save JPEGs at quality 70.
Watch out: sips -Z also enlarges photos that are smaller than the number you give. We tested it on macOS Tahoe: an 800-pixel image came out 1200 pixels wide with -Z 1200, and blurrier. If your folder mixes big and small photos, move the small ones out first. File names are case-sensitive too, so *.jpg skips files ending in .JPG; run it again with *.JPG.
Which method should you use?
| Preview | Convert Image | Shortcuts | sips | |
|---|---|---|---|---|
| Exact pixel size | Yes | No (S / M / L) | Yes | Yes |
| Keeps originals | No, edits in place | Yes | Yes, if saved elsewhere | Yes, with --out |
| Change format too | Via Export, one at a time | JPEG, PNG, HEIF | Yes (Convert Image action) | Yes |
| Target a file size (KB) | No | No | No | Only by trial and error |
| Best for | A handful of photos | Quick sharing | A repeat job | Big folders |
Notice the gap in the fourth row. None of the built-in tools can say "make every photo under 200 KB". Forms and shops often ask for exactly that; our guide on resizing a photo to 50 KB on Mac explains how to get there by hand.
What size should you pick?
- Email or WhatsApp: 1600 px on the long side keeps photos sharp on any screen and usually well under 1 MB as a JPEG.
- Website or blog: 1600–2000 px wide for full-width pictures, 800–1200 px for pictures inside text.
- Instagram: 1080 px wide; portrait posts are 1080 × 1350.
- Online forms: use the exact size the form states, and check the file-size limit as well.
When a batch resizer app helps: Pictailor
We make one, so weigh this part accordingly. Pictailor is a batch photo resizer for Mac for the jobs the built-in tools make fiddly: a whole folder at an exact size and under a file-size limit.
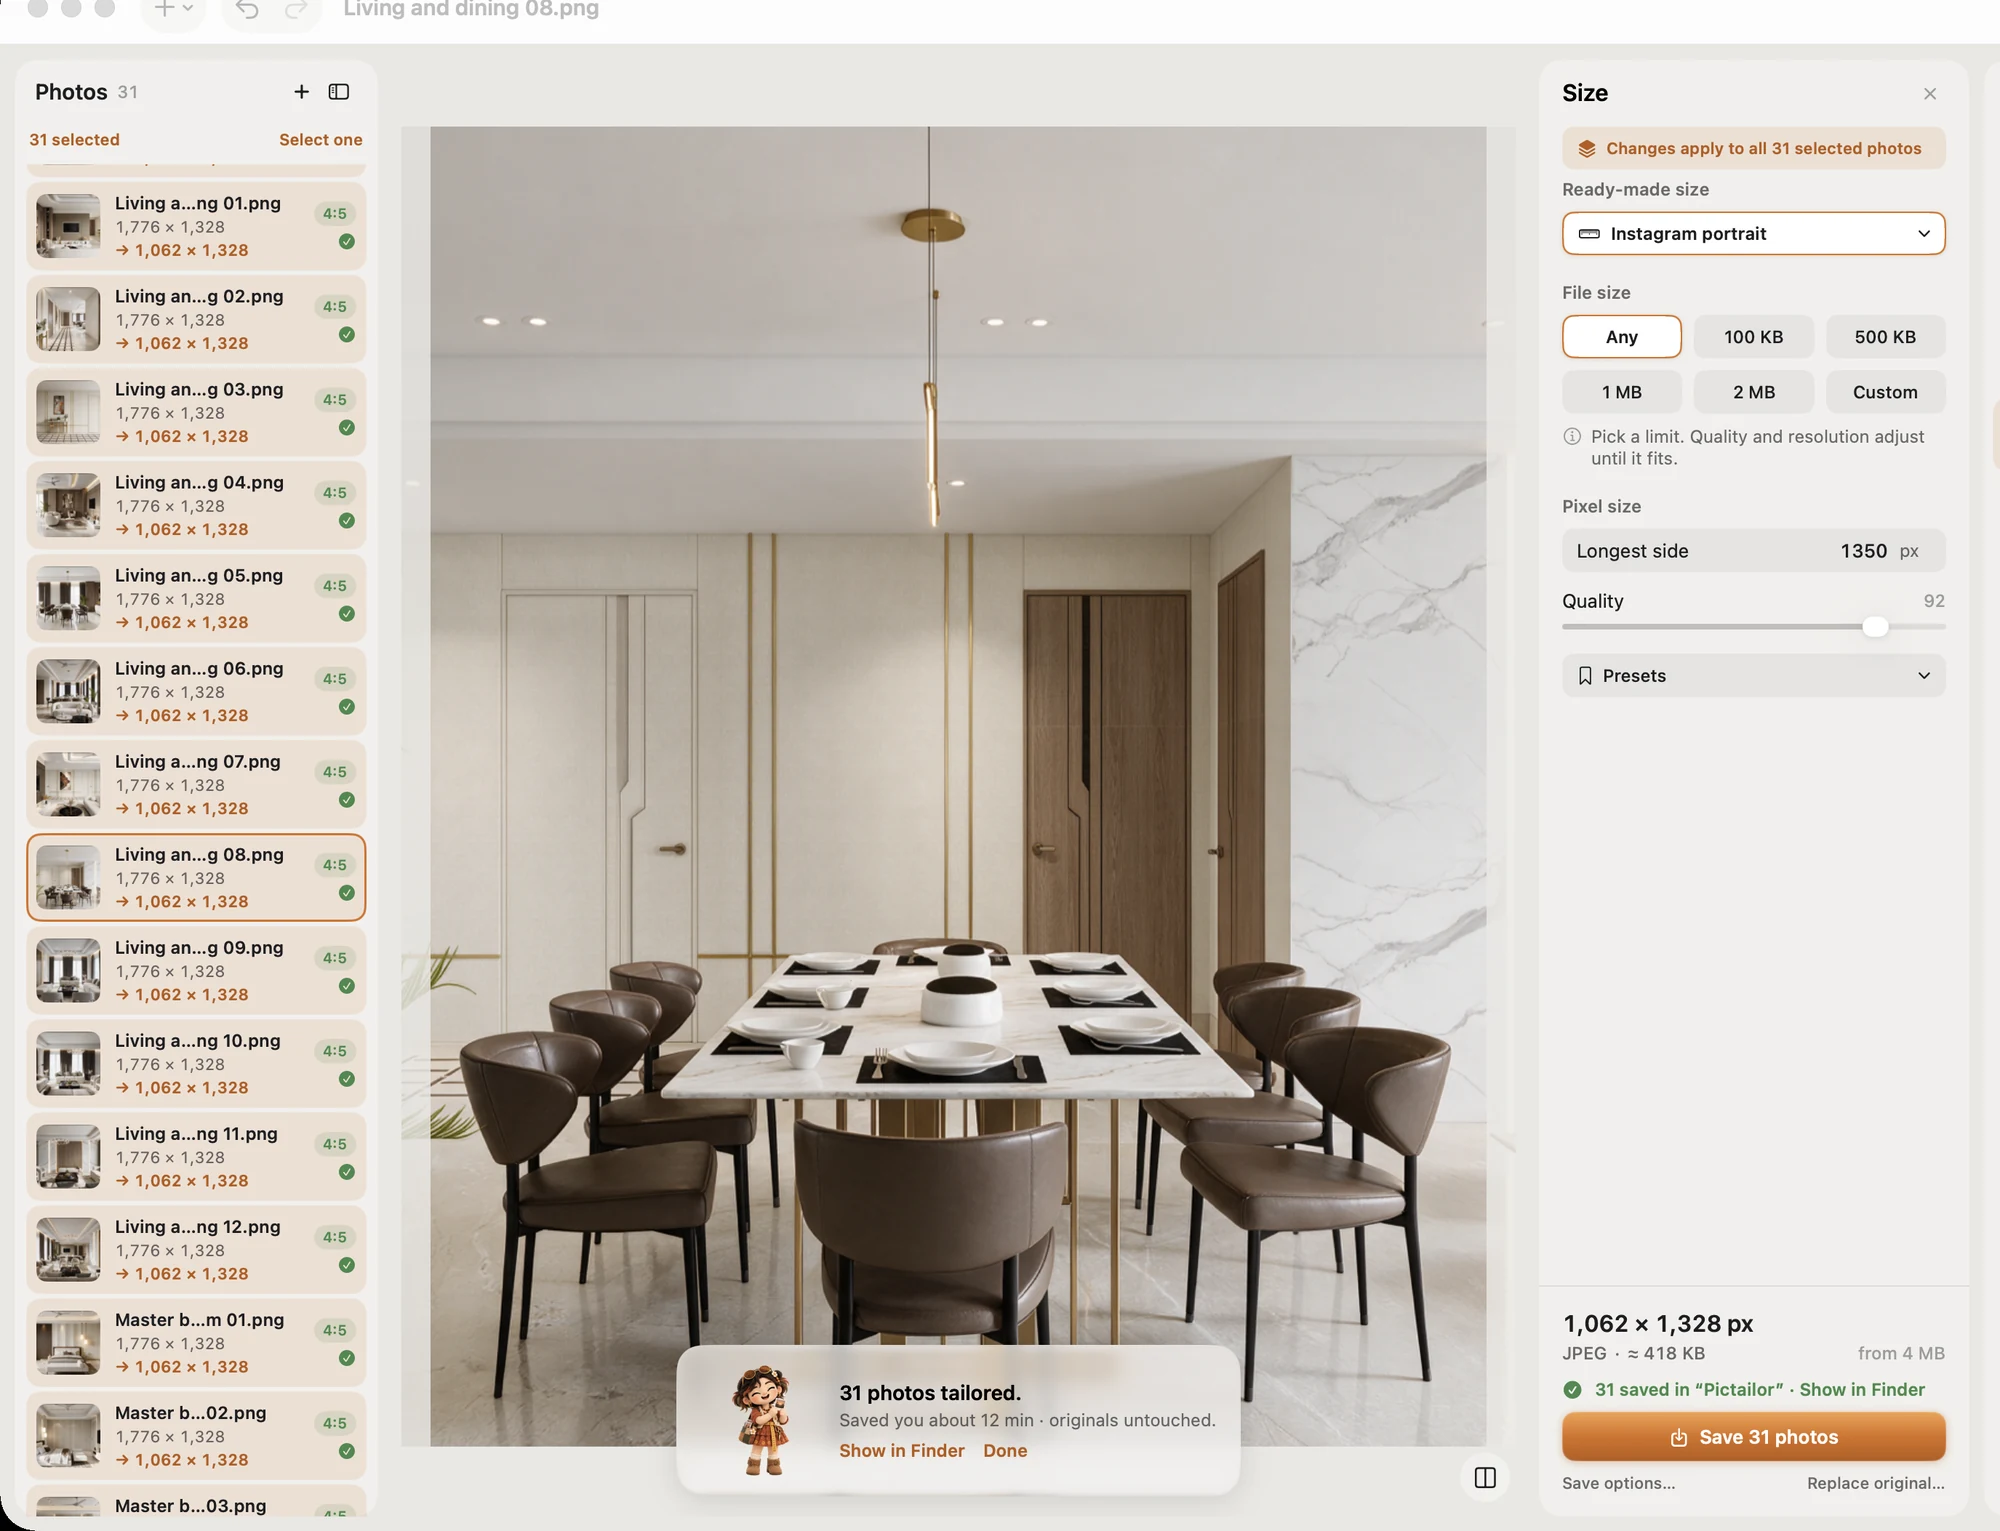
- Resize a whole folder in one Save. Originals are never changed: copies go into a Pictailor folder beside them.
- Compress to an exact file size (for example under 500 KB, 100 KB or 20 KB), checked on the real saved file. It never enlarges a photo.
- Ready-made sizes for social posts, online shops, passport and ID photos for many countries, exam photos and signatures.
- Works with JPEG, PNG, HEIC, TIFF, PDF, GIF and more, and from the Finder's right-click menu without opening the app.
Pictailor is coming soon to the Mac App Store for $4.99 (₹499 in India), paid up front. It runs on Apple Silicon and Intel Macs with macOS 15 or later. Meet Pictailor →
FAQ
Can Preview resize multiple images at once?
Yes. Open them in one Preview window, select all the thumbnails in the sidebar with ⌘ A, then choose Tools › Adjust Size. Work on copies, because Preview changes the files themselves.
Does resizing in Preview overwrite the original photo?
Yes, it saves into the same file. File › Revert To can undo it while the photo is open, but duplicating first (⌘ D in the Finder) is the safer habit.
How do I resize photos on Mac without losing quality?
Keep the long side at or above the size the photo will be shown at (for example 2000 px for a website, 1080 px for Instagram) and never enlarge small photos. That's what makes images blurry.
How do I resize all images in a folder with Terminal?
cd into the folder, run mkdir resized, then sips -Z 1600 *.jpg --out resized/. Originals stay untouched.
Can I batch resize HEIC photos from my iPhone?
Yes. Preview, Convert Image and sips all read HEIC. Pick JPEG as the output format if the place you're sending them to needs it.