Guides › Photos
How to crop multiple images at once on Mac
Updated 6 November 2026 · by Vistaar Studio
Short answer: Preview and Photos can't crop a batch. Preview crops one image at a time, and Photos won't copy a crop from one photo to others. To crop a whole folder to the same ratio or size for free, use the Terminal loop below (tested on macOS Tahoe 26.2), or build a Shortcut with Crop Image inside Repeat with Each.
This page is about cutting many pictures to one shape, say every product photo to 4:5 or every slide to 16:9. If you only need smaller files, see batch resizing images on Mac. If you need squares, making an image square on Mac covers that, including adding white borders instead of cutting.
Which way should you use?
| Method | Crops many at once? | Good for |
|---|---|---|
| Preview | No, one at a time | A handful of images where you pick the framing by eye |
| Photos | No: Apple says crops don't copy with Paste Edits | Photos already in your library, one at a time |
| Shortcuts: Crop Image | Yes, with Repeat with Each | Photos that are all the same size, cut to one fixed size |
Terminal: sips loop | Yes (tested) | Mixed sizes cut to one ratio, then one size |
1. Preview: one image at a time
Apple's Preview guide covers cropping for a single image. Its tip about selecting several images applies to resizing and rotating, not cropping. Adjust Size can change every selected image at once, but it doesn't crop. So in Preview, you crop each image on its own:
- Open the image in Preview. If you opened several together, click one thumbnail in the sidebar.
- Use the Rectangular Selection tool (in the Markup toolbar) and drag over the part you want to keep.
- Choose Tools › Crop (⌘ K).
- Repeat for the next image.
Preview changes the file you have open, so work on copies (File › Duplicate, or copy the folder first).
2. Photos: Paste Edits doesn't include the crop
Photos lets you copy edits from one photo and paste them onto many: Image › Copy Edits, select the other photos, then Image › Paste Edits. But Apple says you can't copy and paste the settings from the crop tool, the retouch and red-eye tools, or third-party extensions.
So in Photos you crop each photo yourself: double-click it, click Edit, then Crop, and pick a ratio from the Aspect menu. The good news is that Photos keeps the original, so you can undo a crop later.
3. Terminal: crop a whole folder with sips (tested)
Every Mac has a command-line image tool called sips. Its crop option is -c height width: height first. It cuts from the centre:
sips -c 1080 864 photo.jpg --out photo-4x5.jpgOn a 1920 × 1080 test image that gave an 864 × 1080 picture (4:5), taken from the middle. To cut from somewhere else, add --cropOffset. It also takes the vertical offset first, then the horizontal one, counted in pixels from the top-left corner:
sips -c 400 400 --cropOffset 0 1400 photo.jpg --out top-right.jpgTwo things caught us out while testing:
- Numbers bigger than the image add black bars.
sips -c 1200 1000on a 1080-pixel-tall image gave a 1000 × 1200 file with black strips at the top and bottom, not a crop. - Don't crop and resize in one command. When we put
-cand-zin the samesipscall, it resized first and then cropped, and we got a squashed 486 × 1350 picture. Run them as two commands.
Crop every photo in a folder to the same ratio and size
Real folders mix sizes, so one fixed crop won't fit them all. This loop works out the largest centred 4:5 area for each photo, crops it, then shrinks anything taller than 1,350 pixels. Results go into a new cropped folder; your originals stay as they are (we checked their checksums before and after).
In Terminal, type cd , drag your photo folder into the window, press Return, then paste:
rw=4; rh=5; maxh=1350
mkdir -p cropped
for f in *.[jJ][pP][gG]; do
  w=$(sips -g pixelWidth "$f" | awk '/pixelWidth/{print $2}')
  h=$(sips -g pixelHeight "$f" | awk '/pixelHeight/{print $2}')
  if (( w * rh > h * rw )); then nh=$h; nw=$(( h * rw / rh )); else nw=$w; nh=$(( w * rh / rw )); fi
  sips -c $nh $nw "$f" --out "cropped/$f" >/dev/null
  if (( nh > maxh )); then sips --resampleHeight $maxh "cropped/$f" >/dev/null; fi
done
Change the first line for other shapes: rw=1; rh=1; maxh=1080 for squares, rw=9; rh=16; maxh=1920 for Stories, or rw=16; rh=9 for widescreen. Here's what we got on macOS Tahoe 26.2:
| Test photo | 4:5, max 1350 | 1:1, max 1080 | 9:16, max 1920 |
|---|---|---|---|
| 1920 × 1080 (landscape) | 864 × 1080 | 1080 × 1080 | 607 × 1080 |
| 1080 × 1920 (portrait) | 1080 × 1350 | 1080 × 1080 | 1080 × 1920 |
| 3840 × 2160 (large) | 1080 × 1350 | 1080 × 1080 | 1080 × 1920 |
| 800 × 450 (small) | 360 × 450 | 450 × 450 | 253 × 450 |
Every result has the right shape, give or take a pixel of rounding. Small photos keep the shape but stay small, on purpose. If you need every file at exactly the same pixel size, you could resize them all with sips -z 1350 1080 cropped/*, but be aware that -z and -Z enlarge small images, which makes them soft. We tested that too: our 360 × 450 crop was blown up to 1080 × 1350.
A few more notes:
sipsis case-sensitive about file names:*.jpgskipped our.JPGfile. The*.[jJ][pP][gG]in the loop catches both. For PNG or HEIC, change it to*.[pP][nN][gG]or*.[hH][eE][iI][cC].- The crop is always centred, so check photos whose subject sits near an edge.
- We tested ordinary JPGs, not phone photos that rely on a rotation tag, so check a few of those before running a big batch.
4. Shortcuts: Crop Image with Repeat with Each
The Shortcuts app has a Crop Image action. Its settings are Position (Center, Top Left, Top Right, Bottom Left, Bottom Right or Custom with X and Y coordinates) plus Width and Height. To crop many files, put it inside a Repeat with Each loop, add Save File after it, and turn on Use as Quick Action in the shortcut's details so you can run it on files selected in the Finder.
The catch: Width and Height are fixed numbers, so it suits batches that are all the same size, like screenshots or photos from one camera. We confirmed these action and setting names in the Shortcuts files on macOS 26.2, but we didn't build and run this shortcut for this guide, so try it on copies first.
Crop a whole folder without Terminal: Pictailor
We make this app, so read this part with that in mind. For a few photos, the free methods are enough. Pictailor is a batch photo resizer for Mac that resizes, crops and compresses a whole folder in one Save.
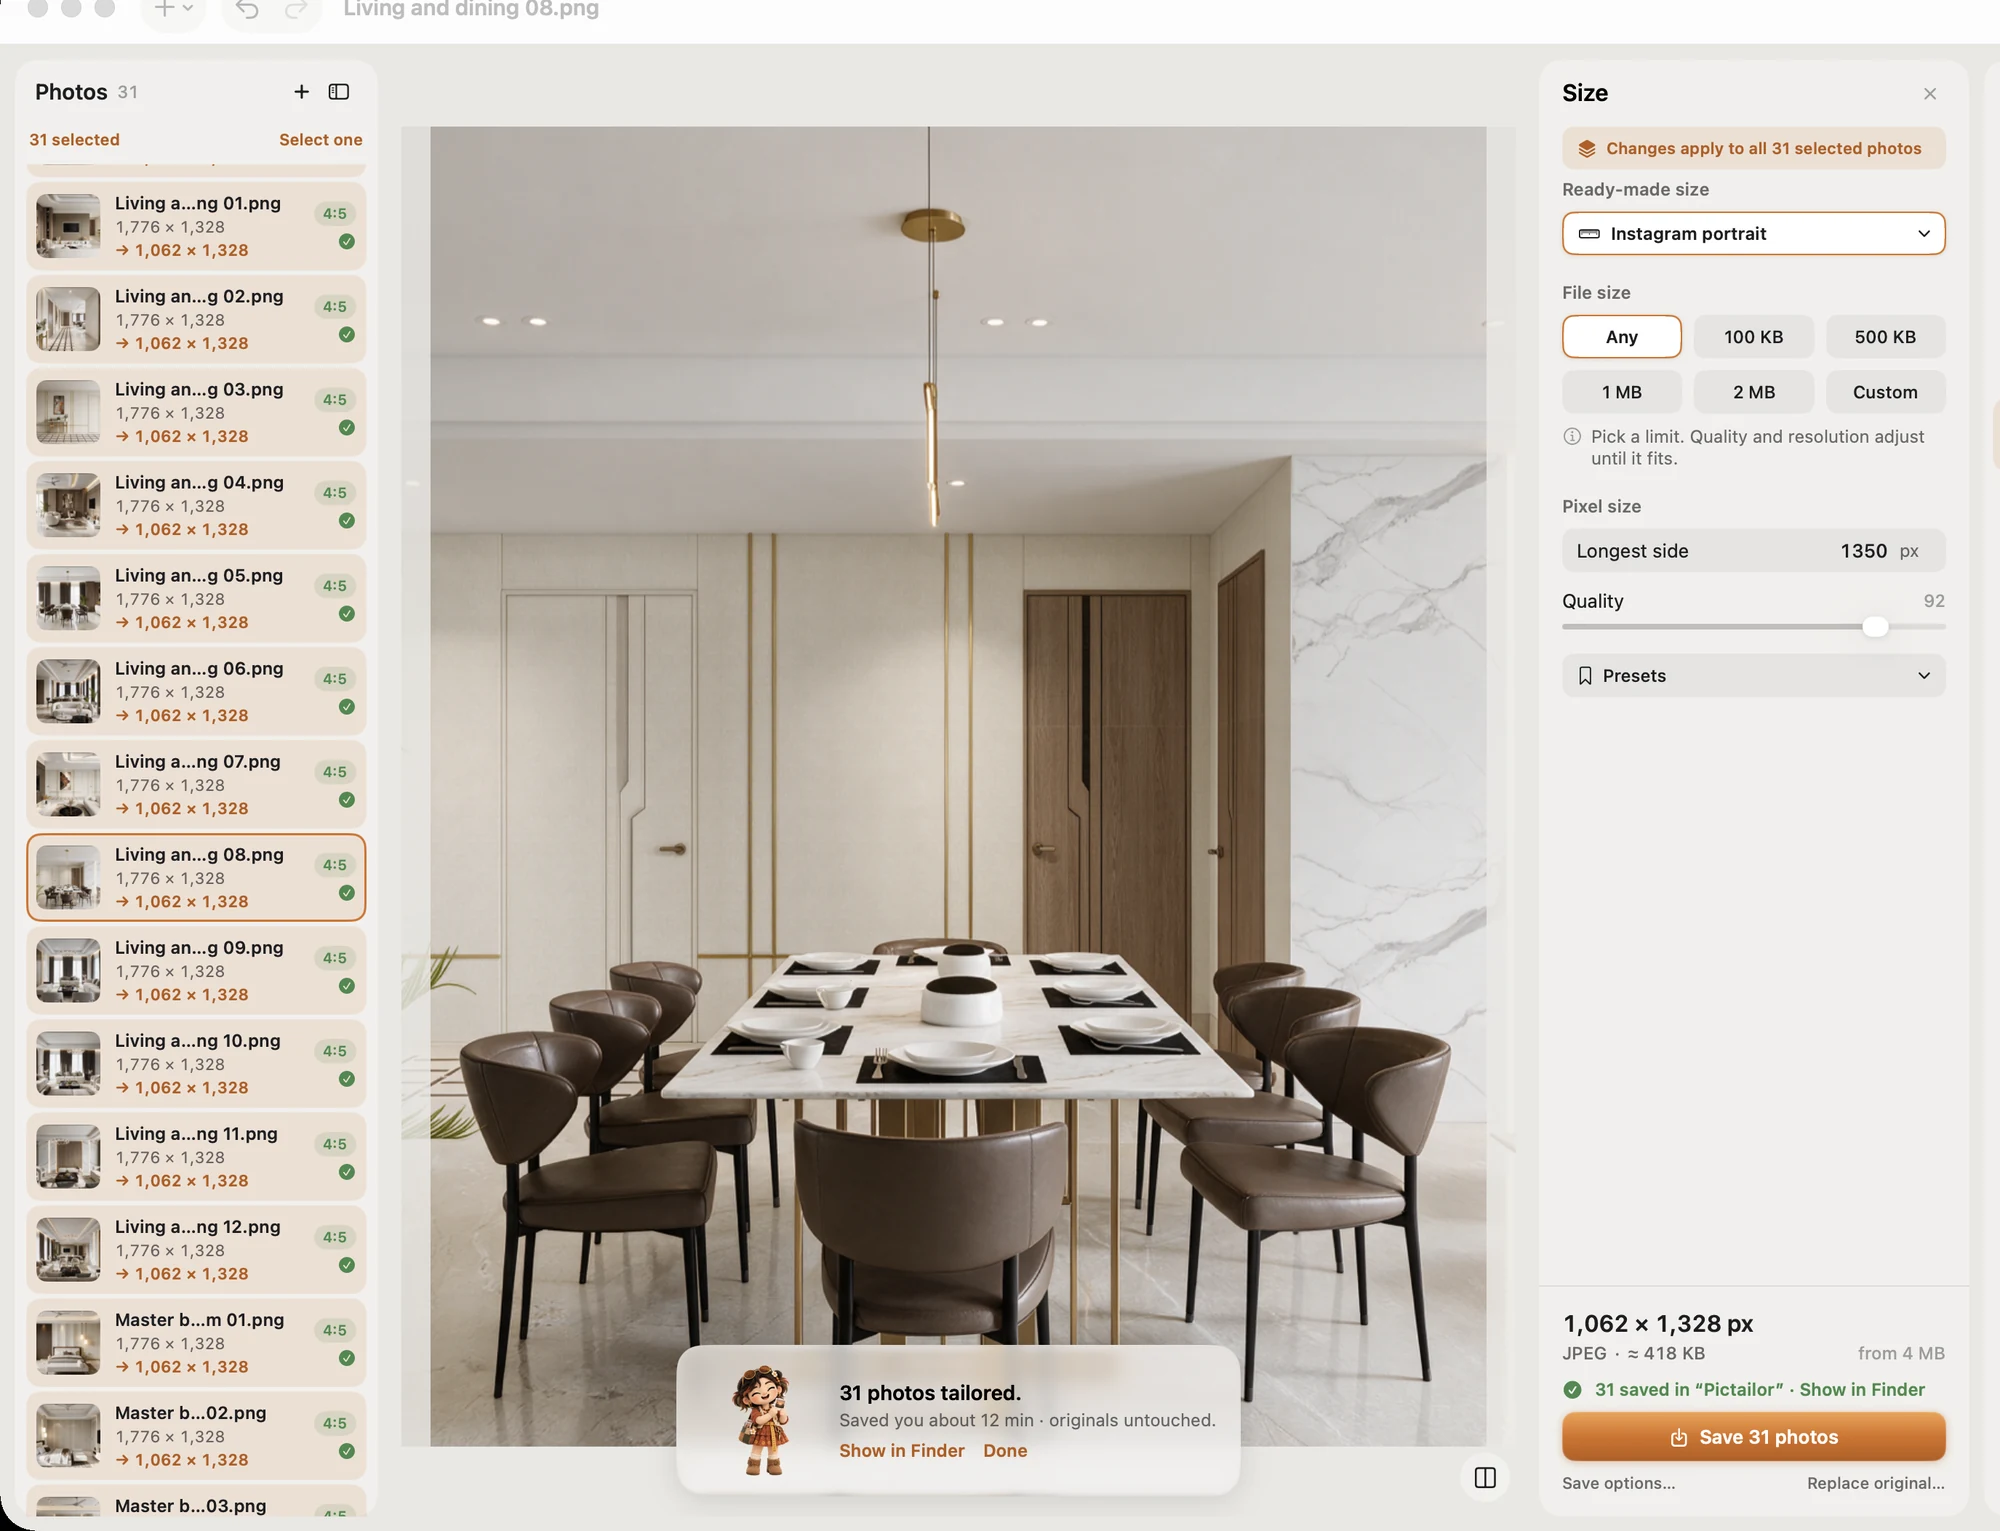
- Batch resize, crop and compress a whole folder in one Save. Originals are never changed: copies go to a Pictailor folder beside them.
- Ready-made sizes for social posts, online shops (Amazon and Shopify white squares), local passport and ID photos for many countries, and exam photos.
- It never enlarges your photos.
Not sure which ratio a site wants? See social media image sizes.
Pictailor is available now from vistaar.studio for $5 (₹499 in India), paid up front, with a licence key for 1 Mac. It's also on the Mac App Store for $4.99. It runs on Apple Silicon and Intel Macs with macOS 15 or later. Meet Pictailor →
FAQ
Can Preview crop several images at once?
No. Apple's Preview guide describes cropping for one image at a time. Selecting several thumbnails in the sidebar works for Tools › Adjust Size, which changes the size but doesn't crop. Crop each image with a rectangular selection and Tools › Crop.
Can I copy a crop from one photo and paste it onto others in Photos?
No. Apple says you can't copy and paste the settings from the crop tool, the retouch and red-eye tools, or third-party extensions. Image › Copy Edits and Paste Edits carry over adjustments such as light and colour, but not the crop.
How do I crop all my images to the same size?
Do it in two steps: crop every image to the same aspect ratio (for example 4:5), then resize them to the same pixel size. The sips loop above does both for a whole folder and writes the results to a new folder.
Why did sips add black bars instead of cropping?
If the height or width you give sips -c is larger than the image, sips pads that side with black instead of cropping. Use numbers no bigger than the image, or let the loop work them out for each file.
Will cropping make my small photos blurry?
Cropping on its own only removes pixels. Blur comes from resizing afterwards: sips -Z and -z enlarge images smaller than the target. The loop on this page only shrinks images that are bigger than your chosen size.