Guides › Screenshots
How to change where screenshots are saved on a Mac
Updated 20 October 2026 · by Vistaar Studio
Short answer: press ⇧ ⌘ 5 to open the Screenshot toolbar, click Options, and under Save to pick Documents, Clipboard, Mail, Messages, Preview, or Other Location… to choose any folder. From then on your screenshots go there instead of the desktop, until you change it back.
Out of the box, every screenshot lands on the desktop as a PNG called something like "Screenshot 2026-10-20 at 10.15.32". After a busy week that's dozens of files on top of everything else. Below: how to send them somewhere sensible, how to find the ones that seem to have vanished, and how to clear the pile that's already there. Everything here is built into macOS.
1. Change the save location (⇧⌘5 › Options)
- Press ⇧ ⌘ 5 (Shift-Command-5). A small toolbar appears at the bottom of the screen.
- Click Options.
- Under Save to, choose one of:
- Desktop or Documents: saves the file there.
- Clipboard: no file at all; the image is ready to paste with ⌘ V.
- Mail, Messages or Preview: opens the screenshot in that app straight away.
- Other Location…: pick any folder you like.
- Press Esc to close the toolbar. You don't have to take a screenshot for the setting to stick.
The new location applies to the usual shortcuts too, so ⇧ ⌘ 3 and ⇧ ⌘ 4 save there as well. The same Options menu has a few other useful switches: Timer (5 or 10 seconds, handy for menus that close when you press a key), Show Floating Thumbnail, Remember Last Selection and Show Mouse Pointer.
2. Make a proper Screenshots folder
If you choose Other Location, it's worth making a home for them first:
- In the Finder, open your Pictures folder (or Documents, wherever you like).
- Press ⇧ ⌘ N for a new folder and call it Screenshots.
- Drag the folder into the Finder sidebar under Favourites, so it's one click away.
- Press ⇧ ⌘ 5 › Options › Other Location… and choose it.
One thing to know if you use iCloud Drive's Desktop & Documents Folders option: anything saved to the desktop or Documents is uploaded to iCloud, screenshots included. A folder inside Pictures isn't part of that, so moving screenshots there also stops them filling your iCloud storage.
If you'd rather not keep most screenshots at all (you take one to paste into a chat, then never need it again), choose Clipboard instead. We wrote a separate guide on copying screenshots to the clipboard, including the Control-key shortcuts that do this for one screenshot without changing the setting.
3. Send one screenshot somewhere else, just this once
You don't need to change the setting for a one-off. After you take a screenshot, a thumbnail sits in the bottom-right corner for a few seconds:
- Drag the thumbnail into a Finder window, a document, an email or a chat, and the screenshot goes there instead.
- Control-click the thumbnail for a menu with Save to Desktop, Save to Documents, Save to Clipboard, Open in Mail, Open in Messages, Open in Preview and more.
If no thumbnail appears, Show Floating Thumbnail is switched off in ⇧⌘5 › Options.
4. "Where did my screenshot go?"
If screenshots aren't appearing on the desktop, one of these is usually why:
| What you see | Likely reason | Fix |
|---|---|---|
| Nothing new on the desktop | Save to was changed in ⇧⌘5 › Options | Open Options and look at which location has the tick |
| The shot pastes fine but there's no file | Control was held (⌃⇧⌘4), or Save to is set to Clipboard | Take it again without Control, or paste it into Preview (File › New from Clipboard) and save |
| Desktop shows a few neat piles | Stacks is on and has grouped the files | Click a stack to open it, or View › Use Stacks to switch it off |
| The screenshot opened in Preview or Mail | Save to is set to that app | Save it from there, then change Options back |
To find screenshots wherever they ended up, press ⌘ Space and type Screenshot, or type it in the search box of any Finder window and choose "This Mac". Names start with "Screenshot" plus the date and time, so sorting by name also sorts them by date.
For a complete list, including screenshots you've renamed, the Mac keeps a hidden "screen capture" flag on each one. In Terminal:
mdfind "kMDItemIsScreenCapture == 1"On the Mac we tested this on, it found screenshots that had been renamed to things like "lah8.png", which a name search would miss. Add -onlyin ~/Desktop before the quotes to limit it to one folder.
5. Clear the screenshots already on your desktop
Changing the location only affects new screenshots. For the pile that's already there:
- Open a Finder window, click Desktop in the sidebar, and type Screenshot in the search box. Click "Desktop" next to "Search:" so it only looks there.
- Press ⌘ A to select all the results.
- Drag them onto your Screenshots folder in the sidebar. On the same disk, dragging moves files rather than copying them (our guide on cutting and pasting files explains the rules).
Or, if you'd rather not move anything, Control-click the desktop and choose Use Stacks (Control ⌘ 0). The desktop groups its files into piles by kind, so dozens of images collapse into one stack you can click open. It doesn't change where anything is stored, and turning Stacks off puts things back as they were.
Keeping it tidy without thinking about it: Desk Buddy (our app)
We make Desk Buddy, so take this with that in mind. Everything above is free and built in, and for most people steps 1 and 5 are enough. Desk Buddy is mostly a clipboard manager, but the Desk Buddy Complete edition adds a screenshot tidy-up for people who want screenshots on the desktop while they're working and gone afterwards:
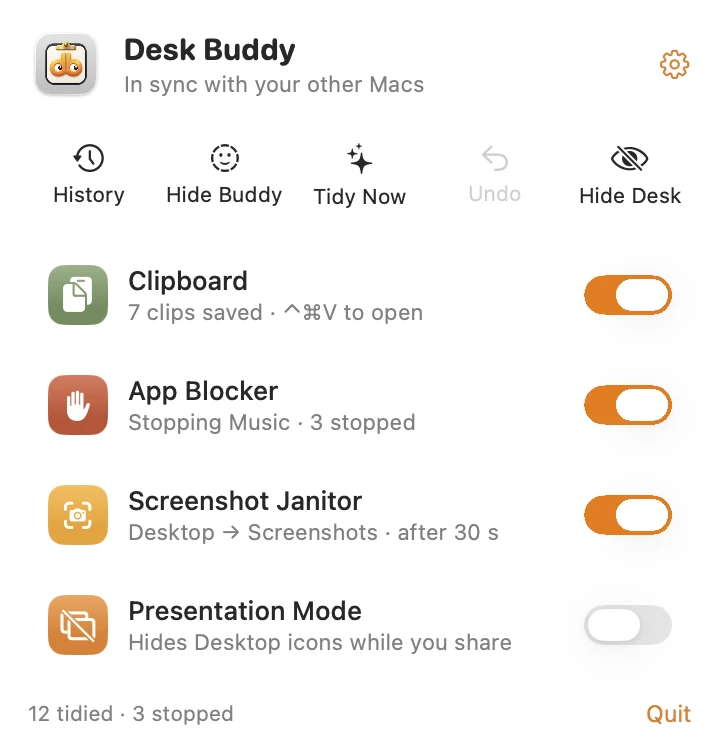
- One click on Tidy Now files every screenshot on the desktop into one Screenshots folder, and Undo puts them back if you need to.
- It can also tidy them for you a short while after you take each one, so you still get a moment to drag the file somewhere first.
- Its clipboard history keeps the screenshots you copy with the Control shortcuts, along with text, links, colours, code and files, so a copied screenshot isn't lost when you copy something else.
Desk Buddy Complete is available now from vistaar.studio: $5 for 1 Mac (₹499 in India), paid up front, instant download. The screenshot tidy-up, App Blocker and Presentation Mode are only in Complete. A Mac App Store edition (clipboard history and Buddy, free 7-day trial, then $9.99) is coming soon. macOS 14 or later. Meet Desk Buddy →
FAQ
Where do screenshots go on a Mac?
To the desktop by default, as PNG files named "Screenshot" plus the date and time. Add Control to the shortcut and they go to the clipboard instead.
How do I change where screenshots are saved?
⇧ ⌘ 5 › Options › Save to, then pick a location or Other Location… for any folder. It stays until you change it.
Why are my screenshots not showing on my desktop?
The location was changed, Control was held so it went to the clipboard, or Stacks has grouped them. Check ⇧⌘5 › Options, or search Spotlight for "Screenshot".
How do I find all my screenshots?
Search for "Screenshot" in Spotlight or the Finder. In Terminal, mdfind "kMDItemIsScreenCapture == 1" also finds ones you've renamed.
Can I move the ones already on my desktop in one go?
Yes: search the desktop for "Screenshot" in Finder, ⌘ A, and drag them into a folder. Or turn on Stacks to group them without moving anything.