Guides › Clipboard
How to cut and paste files on a Mac
Updated 19 October 2026 · by Vistaar Studio
Short answer: the Finder has no Cut for files. Select the file, press ⌘ C, open the folder you want it in, then press ⌥ ⌘ V (Option-Command-V). The file moves there. A plain ⌘ V would paste a copy instead. You can also simply drag a file to another folder on the same disk to move it.
If you've come from Windows, this is one of the first things that trips you up: you select a file, press ⌘ X, and nothing happens, because Cut is greyed out. The Mac does the same job the other way round: you decide whether it's a copy or a move when you paste, not when you copy. Once that clicks, it's arguably safer, since a file is never left floating in a "cut" state. Here are all the ways to move files, and the small traps around them.
1. Copy, then "Move Item Here" (⌥⌘V)
This is the keyboard way, and it's the Mac's version of cut and paste:
- In the Finder, select the file or folder you want to move.
- Press ⌘ C (or Edit › Copy).
- Open the destination folder.
- Press ⌥ ⌘ V. The item moves into this folder and is gone from the old one.
If you prefer menus: after copying, open the Edit menu in the destination folder and hold down ⌥ (Option). Paste Item changes to Move Item Here. The same trick works in the right-click menu inside a folder window.
Changed your mind halfway? Nothing has happened to the file until you paste. And if you paste with plain ⌘ V by mistake, you've only made a copy; delete it, or press ⌘ Z to undo.
2. Drag to move
Dragging is often quicker, especially with two Finder windows side by side (or a folder in the sidebar). What happens depends on where you drop:
| You drag to… | Plain drag | Hold ⌥ Option | Hold ⌘ Command |
|---|---|---|---|
| A folder on the same disk | Moves | Copies | Moves |
| A different disk (USB drive, external SSD, another volume) | Copies | Copies | Moves |
Watch the pointer while you drag: a small green + badge means the Finder is about to make a copy. No badge means a move. Holding ⌘ while dragging to an external drive is how you move files off your Mac to free up space in one step; without it you'd end up with two copies.
3. Moving lots of files at once
Both methods work on a whole selection:
- ⌘-click to pick files one by one, ⇧-click to select a range in list view, or ⌘ A for everything in the folder.
- Then ⌘ C and ⌥ ⌘ V in the destination, or drag any one of the selected files and the rest come along.
- To gather a selection into a brand-new folder, Control-click it and choose New Folder with Selection.
If a file with the same name already exists in the destination, the Finder asks whether to keep both, stop, or replace. Read that dialog carefully: Replace throws away the file that was already there.
4. Why ⌘X is greyed out (and when it does work)
In the Finder, Cut only works on text. Click a file's name to rename it, select part of the name, and ⌘ X works fine on those characters. With a file selected (not its name), Cut stays greyed out. That's by design, not a fault, so there's no setting to switch it on. Use ⌥⌘V instead.
Some file managers and launchers add their own cut command for files. If one is installed it may behave differently from what's described here; the steps above are what a standard Finder does.
5. The Terminal way: mv
If you're comfortable in the Terminal, mv moves files and is handy for patterns:
mv ~/Downloads/report.pdf ~/Documents/
mv ~/Desktop/*.png ~/Pictures/Screenshots/
Be careful: mv doesn't ask before overwriting a file with the same name, and there's no Undo. Add -i (mv -i) to be asked first.
6. The trap: the clipboard holds one thing
The ⌥⌘V move depends on the clipboard still holding the files you copied. The Mac clipboard keeps one item at a time, so if you copy anything else on the way to the destination (a folder name to search for, a message you're replying to), the pending move is gone and ⌥⌘V will paste that text instead, or do nothing.
No harm done: the files are still in their original folder. Go back, select them, ⌘ C again. But if you often juggle files and text at the same time, it's worth knowing the clipboard can do more. On macOS Tahoe, Spotlight keeps a short clipboard history that includes copied files: press ⌘ Space, then ⌘ 4, and find the file. Double-clicking it pastes a copy; to move it, first click its arrow to make it the current clipboard item, then press ⌥ ⌘ V in the destination. Our guide to copying several things at once covers the other built-in tricks.
A clipboard that remembers files: Desk Buddy (our app)
We make Desk Buddy, so read this with that in mind. You don't need it to move files; the Finder steps above are all there is to it. Where it helps is the problem in section 6: it keeps a history of what you copy, including files, as well as text, links, images, colours and code. So the file you copied a minute ago is still in the list after you copy a phone number in between.
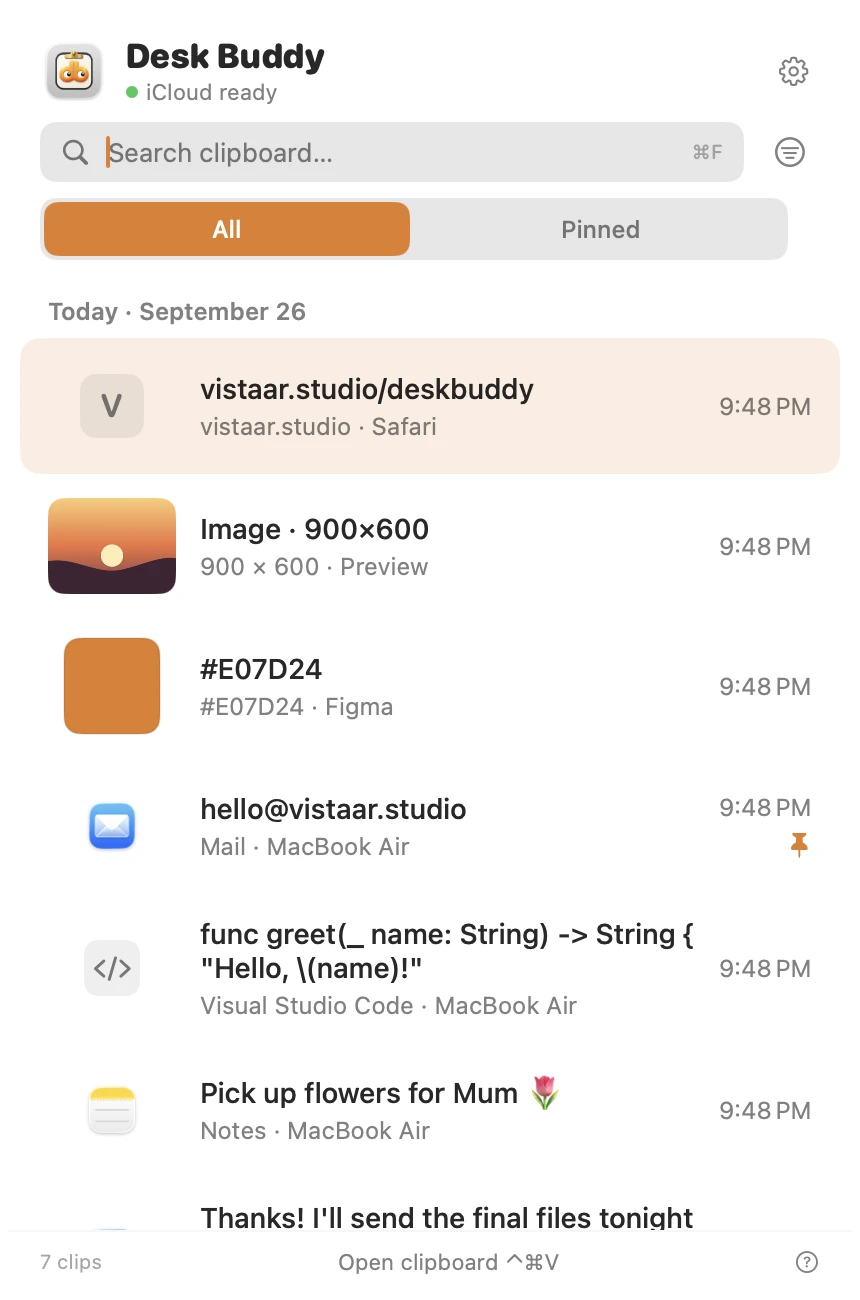
- Press Control ⌘ V (or click the menu-bar icon, or Buddy at the edge of your screen) to open the history, then click a copy to paste it where you were.
- Search, pin the things you reuse, and group them into boards.
- Password managers are left out of the history, and copies other apps mark as private are never saved.
- Optional sync of the history between your Macs through your own iCloud.
Desk Buddy is available now from vistaar.studio as Desk Buddy Complete: $5 for 1 Mac (₹499 in India), paid up front, instant download. A Mac App Store edition is coming soon: a free download with a 7-day free trial, then a one-time $9.99 unlock. It needs macOS 14 or later. Meet Desk Buddy →
FAQ
How do you cut and paste a file on a Mac?
Select it, press ⌘ C, open the destination and press ⌥ ⌘ V. The file moves. Plain ⌘ V pastes a copy instead.
Why is Cut greyed out in the Finder?
The Finder doesn't cut files; ⌘ X only works on text, such as a file name you're editing. Copy, then hold Option in the Edit menu to see Move Item Here.
Does dragging a file move it or copy it?
Same disk: it moves. Different disk: it copies. Hold Option to force a copy, or Command to force a move to another disk.
How do I move many files at once?
Select them all (⌘-click, ⇧-click or ⌘ A), then ⌘ C and ⌥ ⌘ V, or drag one of them.
What if I copy something else before pasting?
The clipboard holds one item, so the files are replaced. They haven't moved yet, so just copy them again.
Can I undo a move?
Yes: right after the move, press ⌘ Z or choose Edit › Undo Move in the Finder.