Guides › Photos
Amazon product photo on Mac: pure white background and the right size
Updated 16 October 2026 · by Vistaar Studio
Short answer: Amazon's main image needs a pure white background (RGB 255, 255, 255), the product filling about 85% of the frame, and at least 500 px on the longest side, with 1,000 px or more recommended. On a Mac: remove the background with Finder's Quick Action, put the cut-out on a white square a little bigger than the product, export as JPEG, and check the white with Digital Color Meter.
Most rejected or suppressed main images fail on two things: a background that looks white but isn't, and a product that's too small (or cut off) in the frame. Both are easy to fix on a Mac without Photoshop. Below are the rules as Amazon states them, a two-minute check you can run on any photo, and two ways to make compliant images: one at a time, or a whole folder at once.
What Amazon asks for
From Amazon's Product image guide for US sellers (other Amazon stores are similar, but check your own Seller Central):
| Rule | Requirement |
|---|---|
| Background (main image) | Pure white, RGB 255, 255, 255 |
| Fill | The product shown as 85% of the image, whole, nothing cut off |
| Size | Minimum 500 px, maximum 10,000 px on the longest side; 1,000 px+ recommended. Don't artificially enlarge small images |
| Format | JPEG (recommended), TIFF, PNG, non-animated GIF; RGB colour preferred |
| Content | One unit, shown once; no props that aren't included, no text, logos, badges or watermarks; packaging only if it matters |
| Special cases | Footwear: a single shoe, facing left, at a 45° angle. Adult clothing: on a standing model. Category guides can add more |
The other image slots (angles, product in use, size charts) are more relaxed, but they still can't carry Amazon logos or badges.
Check a photo before you upload
- Size: select the file in the Finder and press ⌘ I; Dimensions shows the pixels under More Info. Or open it in Preview and choose Tools › Show Inspector.
- White: open Digital Color Meter (Applications › Utilities, or search it with Spotlight). Hover over the background, especially the corners and near the product's shadow. Pure white reads 255 / 255 / 255. A photo of a "white" wall usually reads somewhere around 230 to 245: looks white, isn't.
- Fill: eyeball it. If there's more white than product along the longest side, the product is too small.
Method 1: one photo, built-in apps
- Cut it out. In the Finder, Control-click the photo › Quick Actions › Remove Background (macOS Ventura or later). You get a new transparent PNG beside the original. Our background removal guide covers the other ways and how to tidy edges in Preview.
- Crop it tight. If the cut-out has lots of empty space around the product, open it in Preview, drag a box just around the product and press ⌘ K to crop.
- Put it on white. In Keynote, start a presentation with a plain white theme, click Document in the toolbar and set Slide Size to Custom, for example 2000 × 2000. Drag the PNG in and resize it until its longest side is about 85% of the slide's width (on a 2000 × 2000 slide, about 1700), then centre it.
- Export. File › Export To › Images, choose JPEG, and export. Then run the white check above on the result.
Check the exported corners with Digital Color Meter. If they read less than 255, the theme's background isn't pure white: set the slide background to a white Color Fill in the Format sidebar and export again.
Method 2: a whole folder of cut-outs, with sips
Got 30 products? macOS includes a command-line image tool, sips, that can put every cut-out on its own white square sized so the product fills 85%. We tested this on macOS Tahoe 26.2; transparent areas come out exactly 255, 255, 255.
- Put your transparent PNG cut-outs (cropped tight, as in step 2 above) in one folder.
- Open Terminal, type
cd(with a space), drag the folder onto the Terminal window and press Return. - Paste this and press Return:
mkdir -p amazon
for f in *.png; do
  w=$(sips -g pixelWidth "$f" | awk '/pixelWidth/{print $2}')
  h=$(sips -g pixelHeight "$f" | awk '/pixelHeight/{print $2}')
  long=$(( w > h ? w : h ))
  side=$(( long * 100 / 85 ))
  [ "$side" -lt 1000 ] && echo "Note: $f is only $side px"
  sips -p "$side" "$side" --padColor FFFFFF "$f" --out "amazon/$f" >/dev/null
  sips -s format jpeg -s formatOptions 90 "amazon/$f" --out "amazon/${f%.png}.jpg" >/dev/null && rm "amazon/$f"
done
Each finished JPEG lands in a new amazon folder; your PNGs aren't touched. What it does: it finds the longer side of each cut-out, makes a white square about 18% bigger (so the product is 85% of it), centres the product and saves a JPEG at quality 90.
- Two steps on purpose. In our test, asking sips to pad and convert to JPEG in one command saved PNG data under a .jpg name, which some upload forms reject.
- "Note: … is only 900 px" means the source photo is small. Amazon asks you not to enlarge small images, so reshoot or use a higher-resolution original rather than scaling it up.
- Case matters: files ending in
.PNG(capitals) are skipped. Rename them, or change*.pngto*.PNG. - If the product looks off-centre, the cut-out had uneven empty space around it. Crop it tighter and run it again.
Getting a better starting photo
- Shoot on something plain and contrasting. A dark product on white card, or a light product on grey, cuts out much more cleanly than beige on beige.
- Use even, soft light. A window with a sheet over it beats a single lamp. Hard shadows get cut out as part of the product.
- Fill the camera frame. The closer you shoot (without cropping the product), the more pixels you get, which keeps you well over 1,000 px.
- One item, once. Show only what the buyer gets. Extra angles go in the other image slots.
- File names. Uploading in bulk? Amazon's naming pattern is the product identifier, the variant code and the extension, for example
B000123456.MAIN.jpg.
White squares in one Save: Pictailor
We make this app, so weigh this part with that in mind. If you list products often, Pictailor, our batch photo resizer for Mac, keeps the cut-out, the white square, the size and the file size in one place.
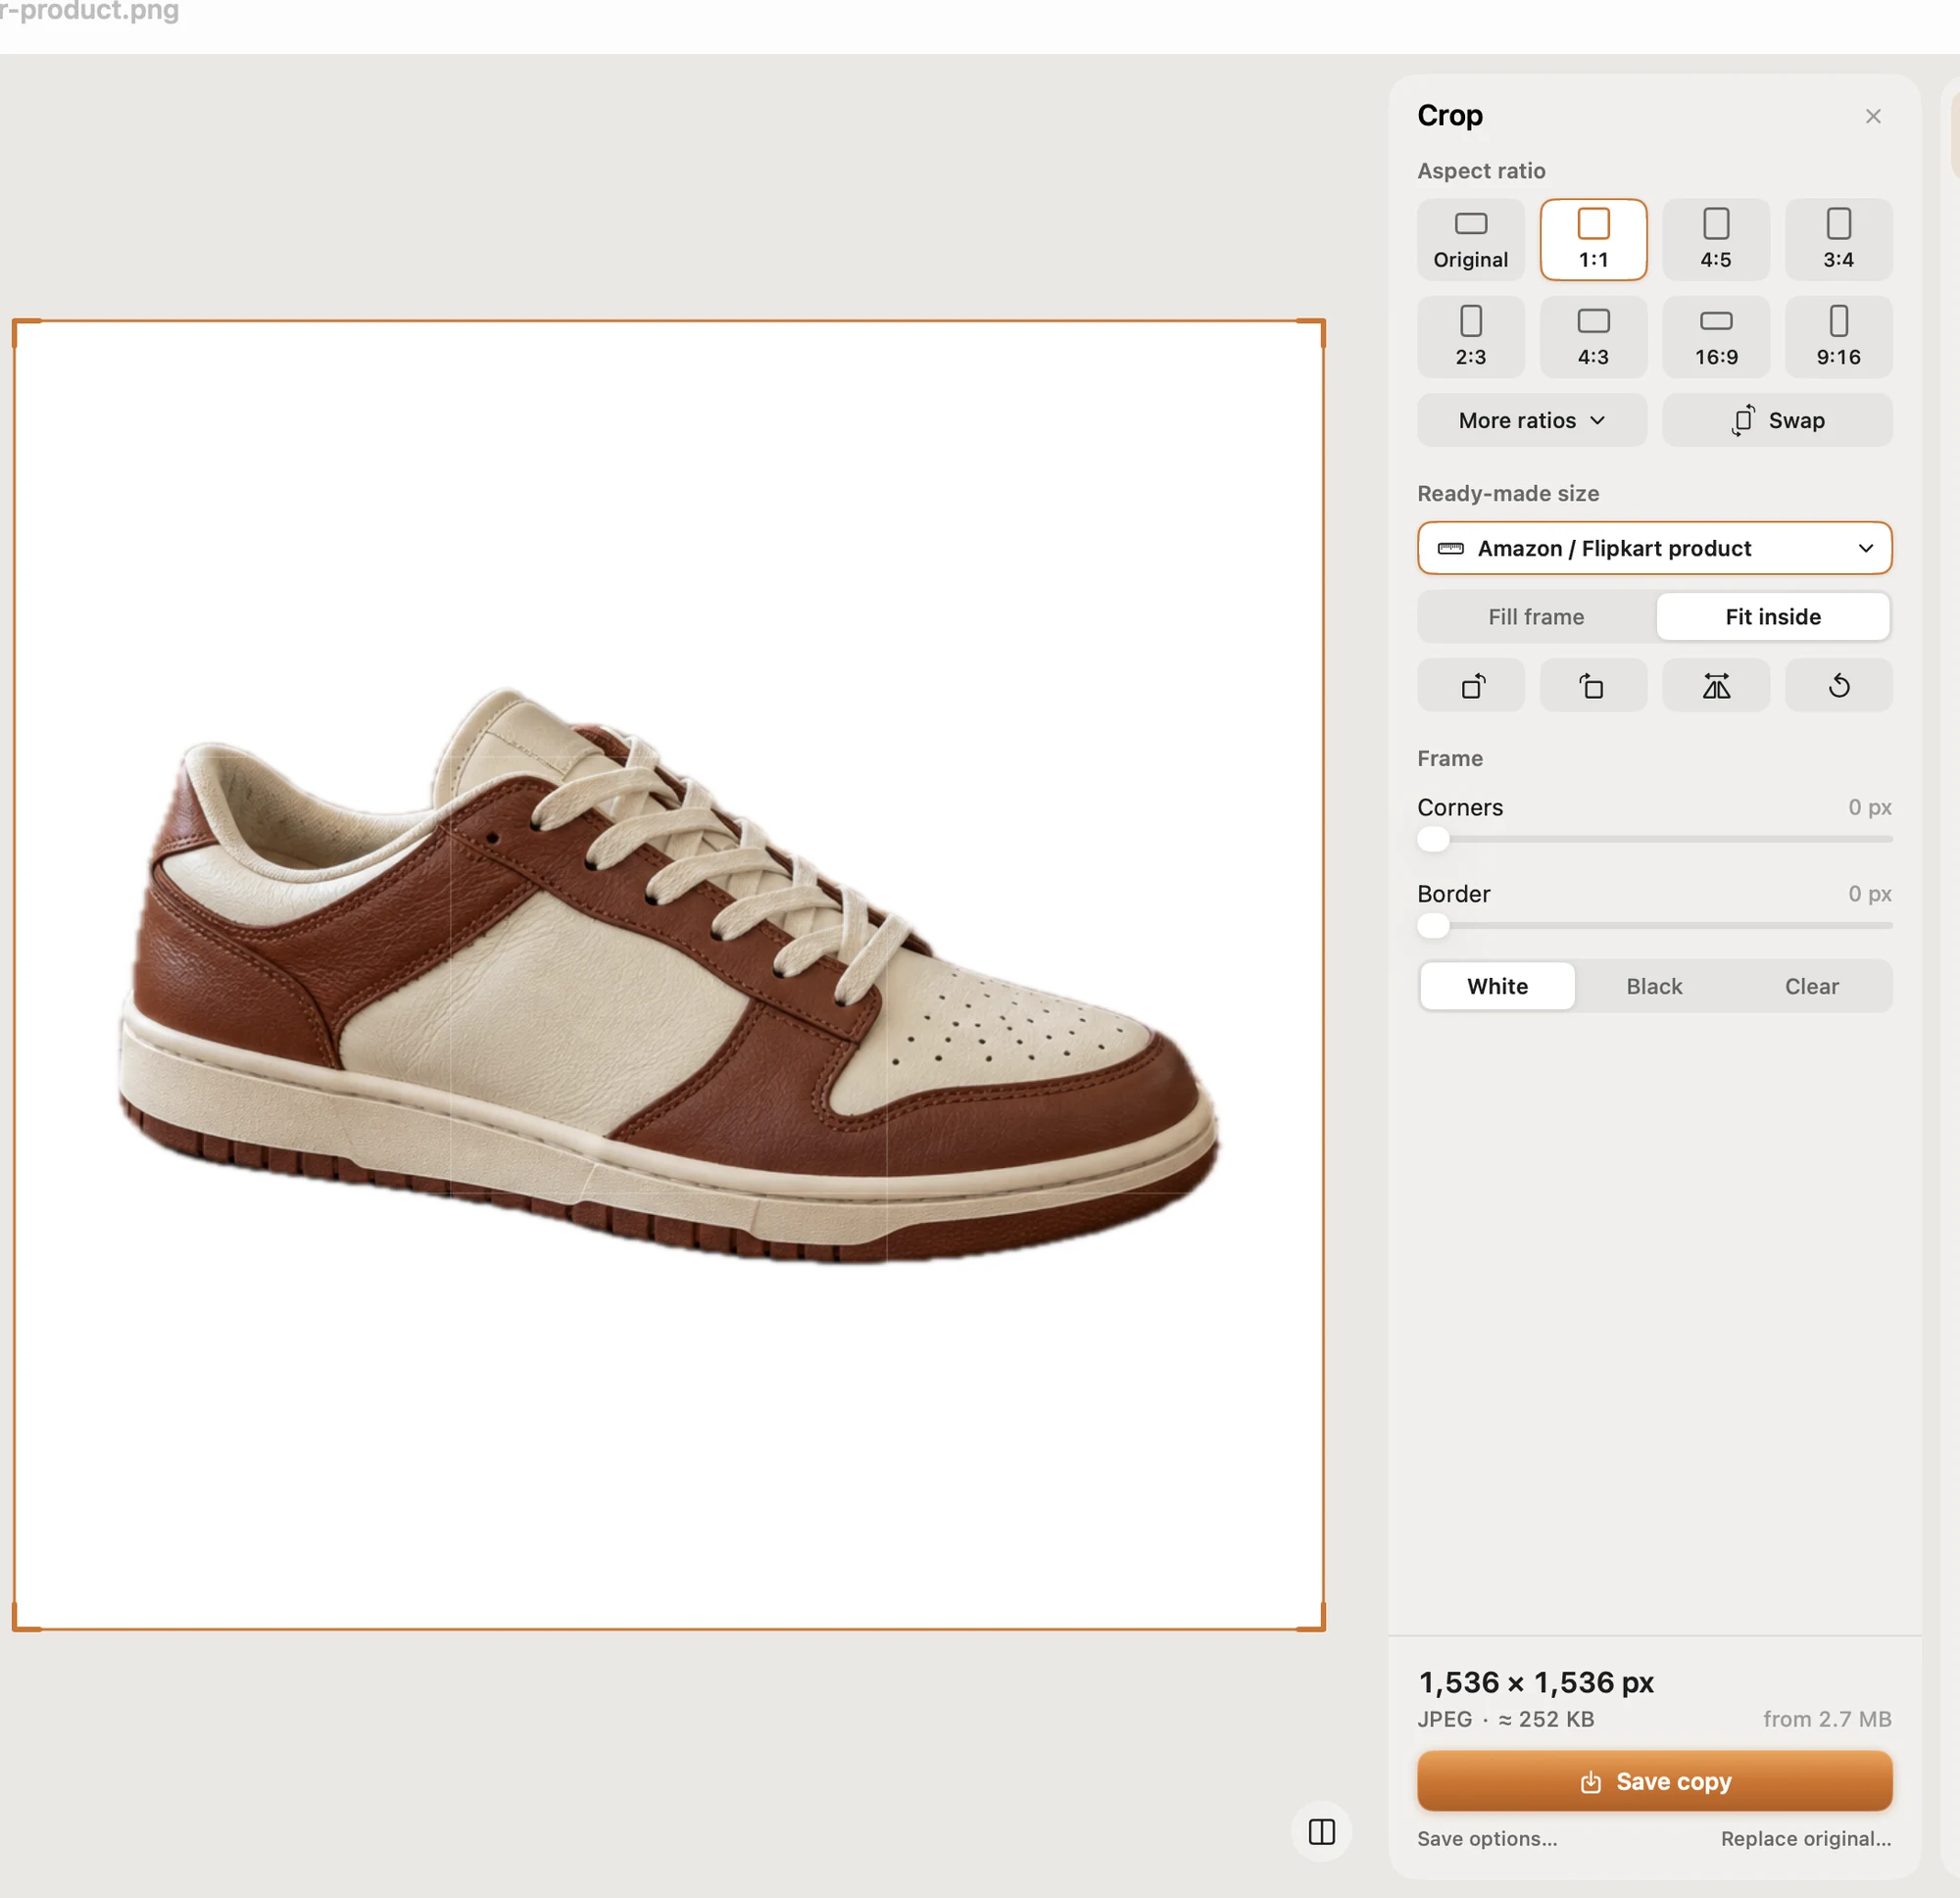
- Ready-made sizes for online shops, including an Amazon / Flipkart product white square, plus social posts, passport and ID photos for many countries, exam photos and signatures.
- Remove the background on-device, and erase small objects such as a stray thread or a bit of paper (a one-time model download).
- Batch a whole folder in one Save. Originals are never changed: copies go to a Pictailor folder beside them.
- Compress to an exact file size, checked on the real saved file. It never enlarges a photo.
Pictailor is available now from vistaar.studio for $5 (₹499 in India), paid up front, with a licence key for 1 Mac. It's also on the Mac App Store for $4.99. It runs on Apple Silicon and Intel Macs with macOS 15 or later. Meet Pictailor →
FAQ
What size should an Amazon product image be?
At least 500 px on the longest side, with 1,000 px or more recommended, up to 10,000 px. A 1,500–2,000 px square is a safe choice. Don't enlarge small photos.
What exact white does Amazon want for the main image?
Pure white, RGB 255, 255, 255. Photos against a white wall usually come out light grey.
What does 85% of the image mean on Amazon?
The product should take up about 85% of the frame: on a 2,000 px square, roughly 1,700 px along its longest side, with nothing cut off.
Can I upload a PNG with a transparent background to Amazon?
PNG is accepted, but the main image needs a pure white background, so place the cut-out on white first. JPEG is recommended.
How do I check if my background is pure white on a Mac?
Open Digital Color Meter (Applications › Utilities) and hover over the background. Pure white reads 255 in all three channels.
Do Flipkart, Etsy and Shopify use the same rules?
Not exactly. Most like a plain light background and a square image, but sizes and fill rules differ, so check each one's seller help.