Guides › Photos
How to convert PNG to JPG on Mac
Updated 22 October 2026 · by Vistaar Studio
Short answer: select the PNG (or several) in the Finder, Control-click and choose Quick Actions › Convert Image. Set Format to JPEG, keep Actual Size, and click Convert to JPEG. The JPG copies appear next to the originals. It's free and built into macOS Monterey and later. One catch: any transparent background becomes a solid colour, because JPEG can't do transparency.
People usually need this for one of three reasons: a form or portal says "JPG only", a PNG is far too big to email or upload, or a website builder wants photos as JPEG. All three are easy on a Mac without extra software. Below are the built-in ways, what we found when we tested them, and the cases where you should keep the PNG.
PNG or JPG: which one do you actually want?
| PNG | JPG / JPEG | |
|---|---|---|
| Compression | Lossless: every pixel kept | Lossy: smaller, slightly softer |
| Transparency | Yes | No (filled with a colour) |
| Best for | Logos, icons, screenshots with text, cut-outs | Photos, renders, anything with smooth colour |
| Accepted by forms and portals | Often, not always | Almost everywhere |
JPG and JPEG are the same format; the extension is just spelled two ways. Converting a photo from PNG to JPG is nearly always a good idea. Converting a logo or a screenshot full of small text usually isn't, unless something forces you to.
1. Finder Quick Action: Convert Image (easiest)
- In the Finder, select one PNG, or several (hold ⌘ and click, or drag a box around them).
- Control-click (right-click) the selection and choose Quick Actions › Convert Image.
- Set Format to JPEG.
- Set Image Size to Actual Size to keep every pixel. Small, Medium or Large also shrink the image, which helps for email.
- Leave Preserve Metadata ticked unless you want to strip details such as location.
- Click Convert to JPEG. New
.jpgfiles appear in the same folder; the PNGs stay as they were.
No Convert Image? You need macOS Monterey (12) or later. Also check Quick Actions › Customise to make sure it's switched on.
2. Preview: when you want to choose the quality
Preview gives you a Quality slider and shows the file size before you save, which is handy when a form has a KB limit.
- Open the PNG in Preview.
- Choose File › Export.
- Set Format to JPEG and drag Quality. The estimated file size updates underneath.
- Pick a folder and click Save. Export writes a new file, so the PNG is untouched.
Several files: select them all in the Finder and press ⌘ O to open them in one Preview window. Show the sidebar (View › Thumbnails), click a thumbnail, press ⌘ A, then choose File › Export Selected Images, click Options, and set Format to JPEG and the quality.
3. Terminal: a whole folder in seconds
For hundreds of files, the built-in sips command is fastest. Open Terminal, type cd (with a space), drag the folder into the window, press Return, then run:
mkdir jpg
sips -s format jpeg -s formatOptions 80 *.png --out jpg/
That writes a JPG copy of every PNG into a new jpg folder, at quality 80 (use any number from 1 to 100, or high). sips renames the copies to .jpg for you. It's case-sensitive, so if some files end in capital .PNG, run it again with *.PNG.
What we found when we tested it
We ran the sips command on macOS Tahoe 26.2 with three images from this site, same pixel size before and after. (All three started as compressed web images, so treat the numbers as a guide, not a promise.)
| Image | PNG | JPG q92 | JPG q80 | JPG q60 |
|---|---|---|---|---|
| Photo-style desk scene (1920 × 1080) | 1.7 MB | 401 KB | 311 KB | 212 KB |
| App window screenshot with text (1800 × 1342) | 1.0 MB | 374 KB | 305 KB | 220 KB |
| Character with transparent background | 633 KB | 108 KB at default quality; transparent area became pure white | ||
So for photos, expect the JPG to be a fifth to a quarter of the PNG at quality 80, with no visible difference at normal size. Our screenshot started life as a compressed image, so a crisp screenshot straight from ⇧ ⌘ 4 may shrink less and show more softness around text. Zoom in on one before converting a batch.
Transparency: we checked the corner pixel of the converted character. In the PNG it was fully see-through; in the JPG it was solid white (255, 255, 255). That's fine for most forms and shops. If you need a different background colour, or must keep it see-through, don't convert.
Common problems
- "I renamed it to .jpg and the website still rejects it." Renaming doesn't convert anything; the file is still PNG inside. Use one of the methods above.
- The JPG is still too big for the form. Lower the quality in Preview, or reduce the pixels too. Our guide on resizing a photo to 50 KB on Mac shows both.
- The logo now has a white box around it. That's the transparent area being filled. Keep the PNG for the logo, or place it on the right background first.
- Text in a screenshot looks fuzzy. JPEG struggles with sharp edges. Use quality 90 or above, or keep PNG if the place you're uploading to accepts it.
- Screenshots keep saving as PNG. That's the macOS default. Converting afterwards, as above, is the safe way to get JPGs.
- The photo came from an iPhone as HEIC, not PNG. Same idea, slightly different steps: see how to convert HEIC to JPG on Mac.
Convert and resize a folder in one go: Pictailor
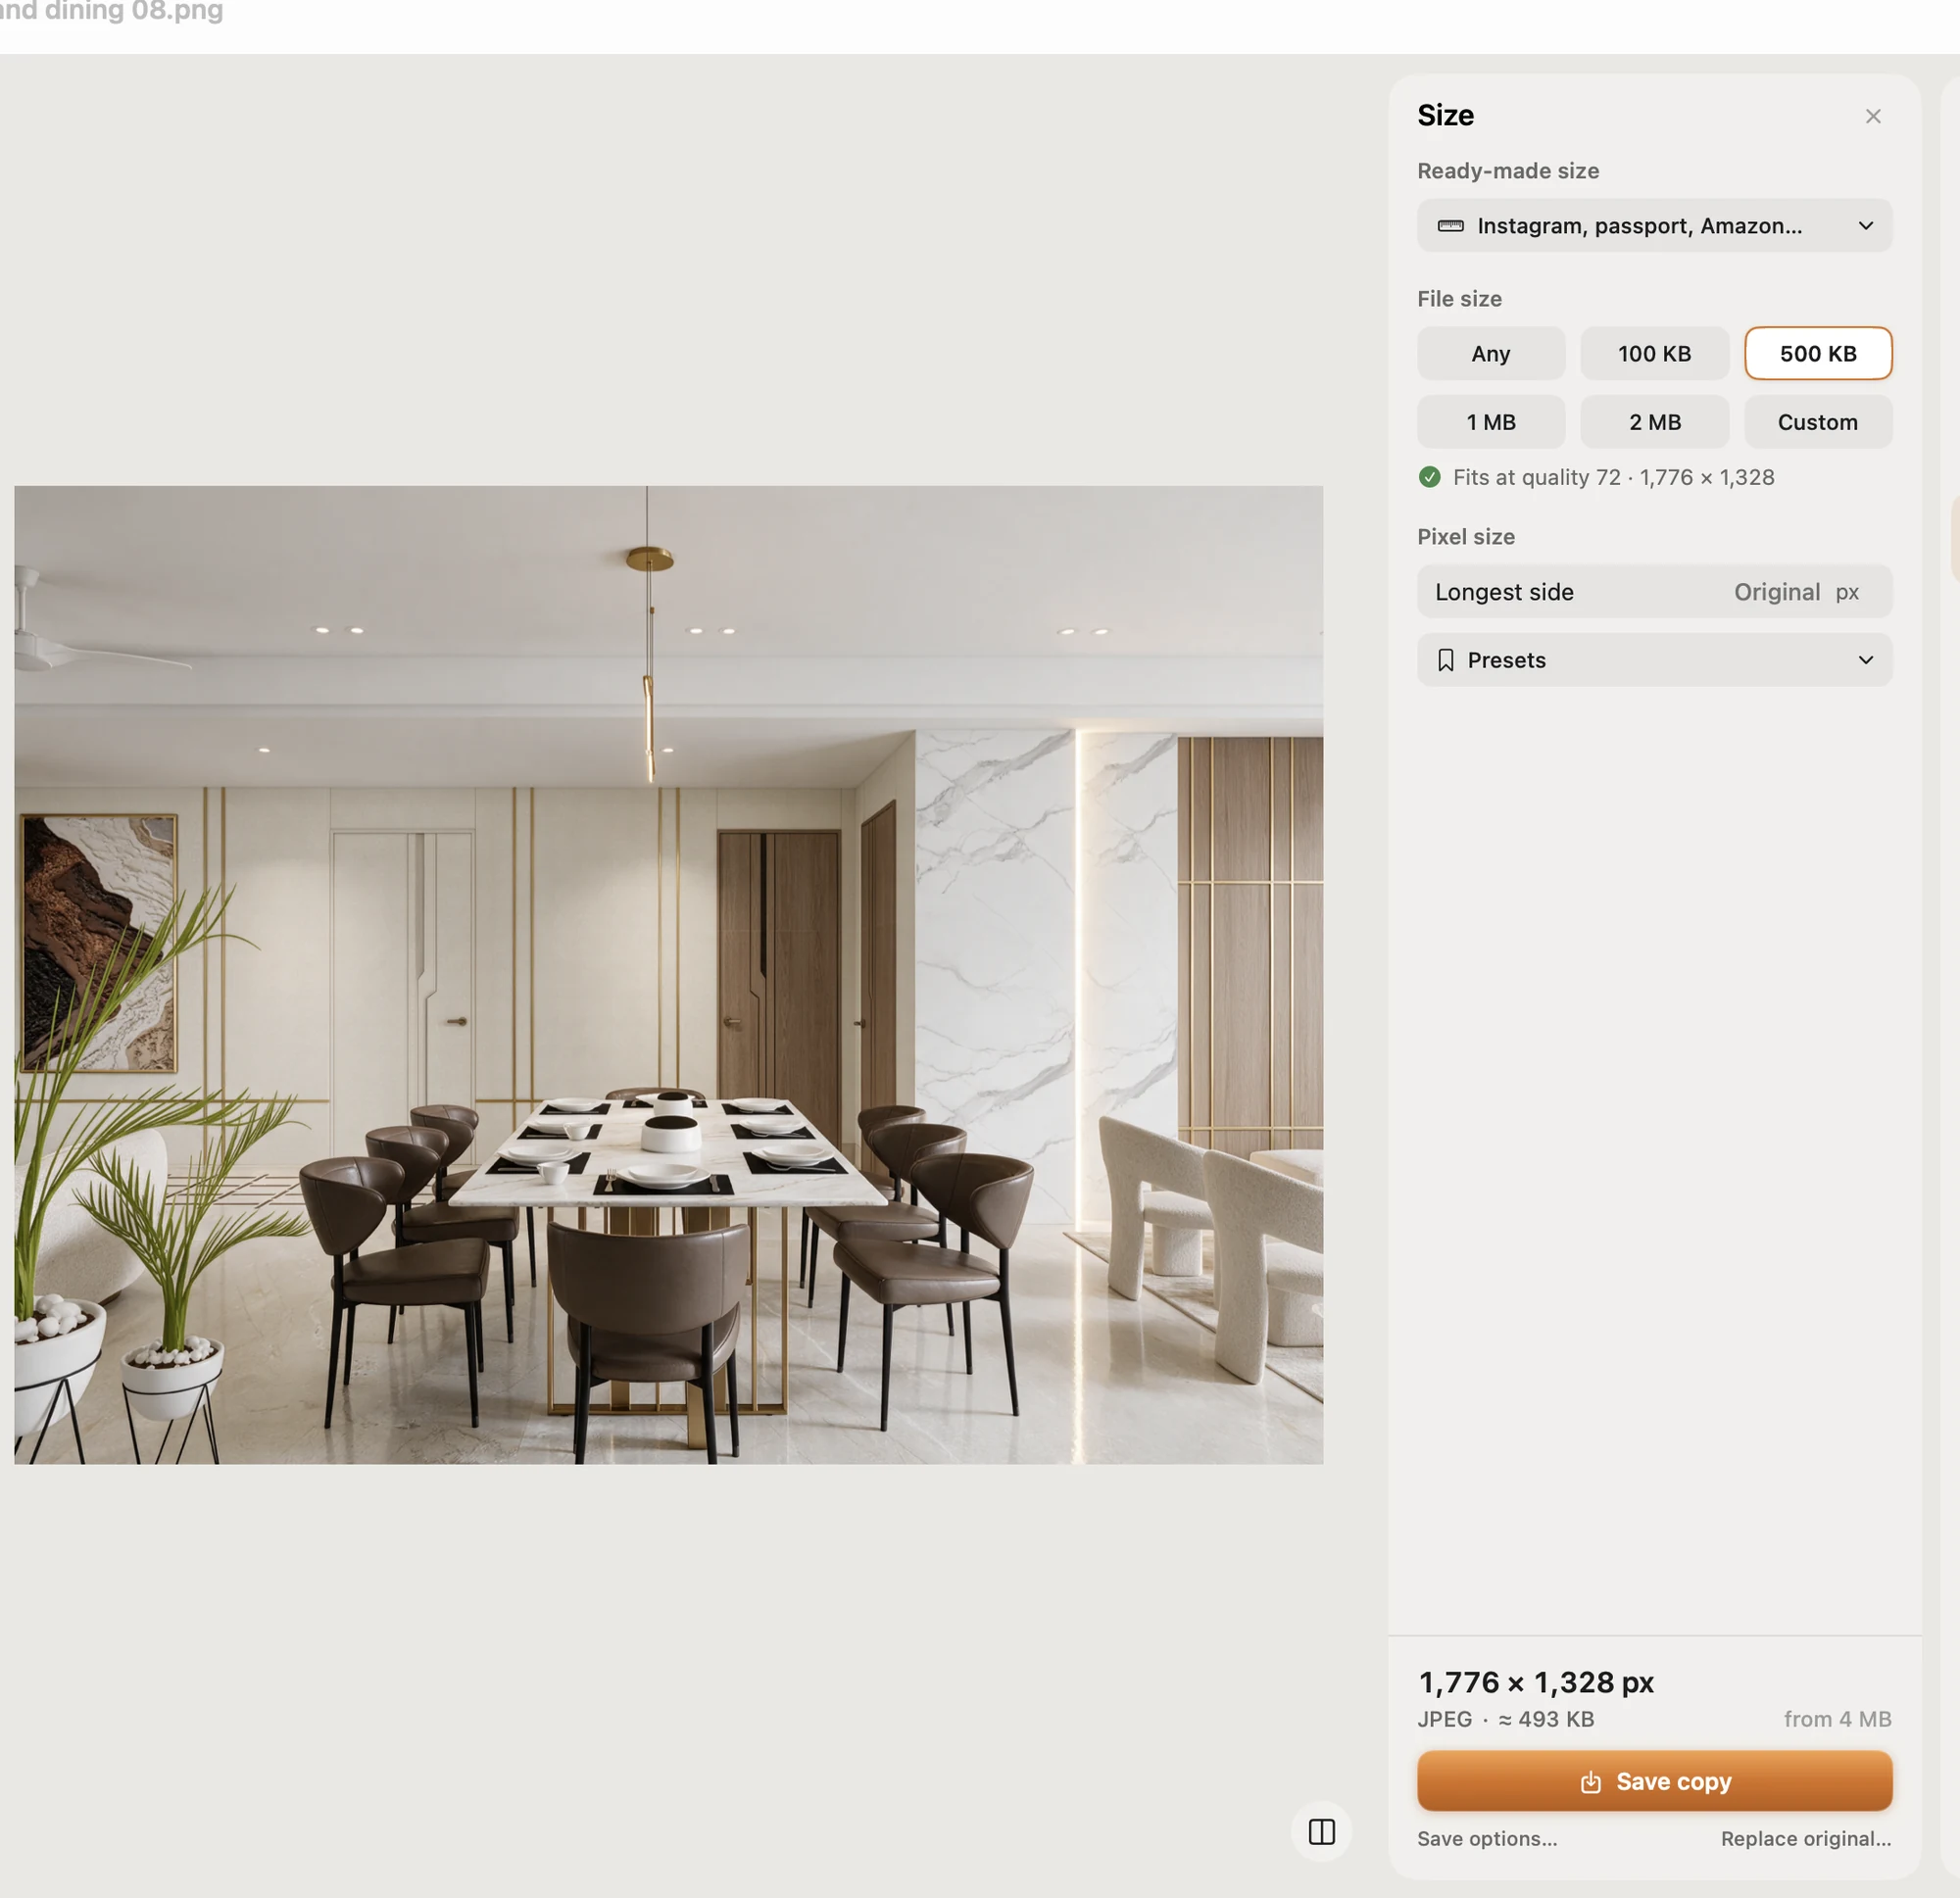
We make this app, so read this part with that in mind. For plain PNG to JPG, the Finder's Convert Image is all you need. Pictailor helps when converting is only half the job and the photos also have to hit a size: pixels for a shop or social post, or KB for a form.
- Opens and saves JPEG, PNG, HEIC, TIFF, PDF, ICO, ICNS and GIF.
- Batch resize a whole folder in one Save. Originals are never changed: copies go to a Pictailor folder beside them.
- Compress to an exact file size (under 500 KB, 100 KB, 20 KB…), checked on the real saved file. It never enlarges a photo.
- Ready-made sizes for social posts, online shops (Amazon and Shopify white square), passport and ID photos for many countries, exam photos and signatures.
- Right-click in the Finder (Services) to resize without opening the app.
Pictailor is available now from vistaar.studio for $5 (₹499 in India), paid up front, with a licence key for 1 Mac. It's also on the Mac App Store for $4.99. It runs on Apple Silicon and Intel Macs with macOS 15 or later. Meet Pictailor →
FAQ
How do I convert a PNG to JPG on a Mac for free?
Control-click it in the Finder, choose Quick Actions › Convert Image, set Format to JPEG and click Convert to JPEG. Or open it in Preview and use File › Export.
How do I convert many PNG files to JPG at once?
Select them all and use Convert Image, or Preview's Export Selected Images. In Terminal: sips -s format jpeg *.png --out jpg/.
What happens to a transparent background?
It's filled with a solid colour, because JPEG has no transparency. In our sips test it became pure white. Keep the PNG if you need it see-through.
Does converting PNG to JPG reduce quality?
Slightly. Photos hide it well; text and sharp graphics show it more. Use quality 80+ and check one file zoomed in.
Why is my PNG so much bigger than the JPG?
PNG stores every pixel exactly. Our 1920 × 1080 photo-style scene was 1.7 MB as PNG and 311 KB as a quality-80 JPG.
Can I just rename .png to .jpg?
No. The data inside stays PNG, and some sites and apps will reject it. Convert it properly instead.